How An Atlanta Pet Photographer Decides Where to Place Your Dog in a Photo
When clients watch me work during a session, they usually assume I'm looking for a "pretty spot."
What I'm actually doing is making a series of quick decisions in a specific order — every time, without exception, regardless of how familiar I am with a location.
Light first. Then background. Then foreground. Then placement.
This is how you get photos that feel intentional and polished without needing a perfectly trained dog, and how you make your post production life easier.
Whether you’re a dog parent trying to understand how sessions work and why I’m asking you to stand here when there’s a really pretty thing over there, or a photographer trying to level up your dog portraits, here's exactly how I think through each one.
Step 1: Light
Before I care about the background, the scenery, or whether there’s a cute rock… I’m looking for good light.
Light — Always First
I never choose a background first and hope the light works. I find the light and let it dictate where the session happens.
For dog portraits, good light means one of two things.
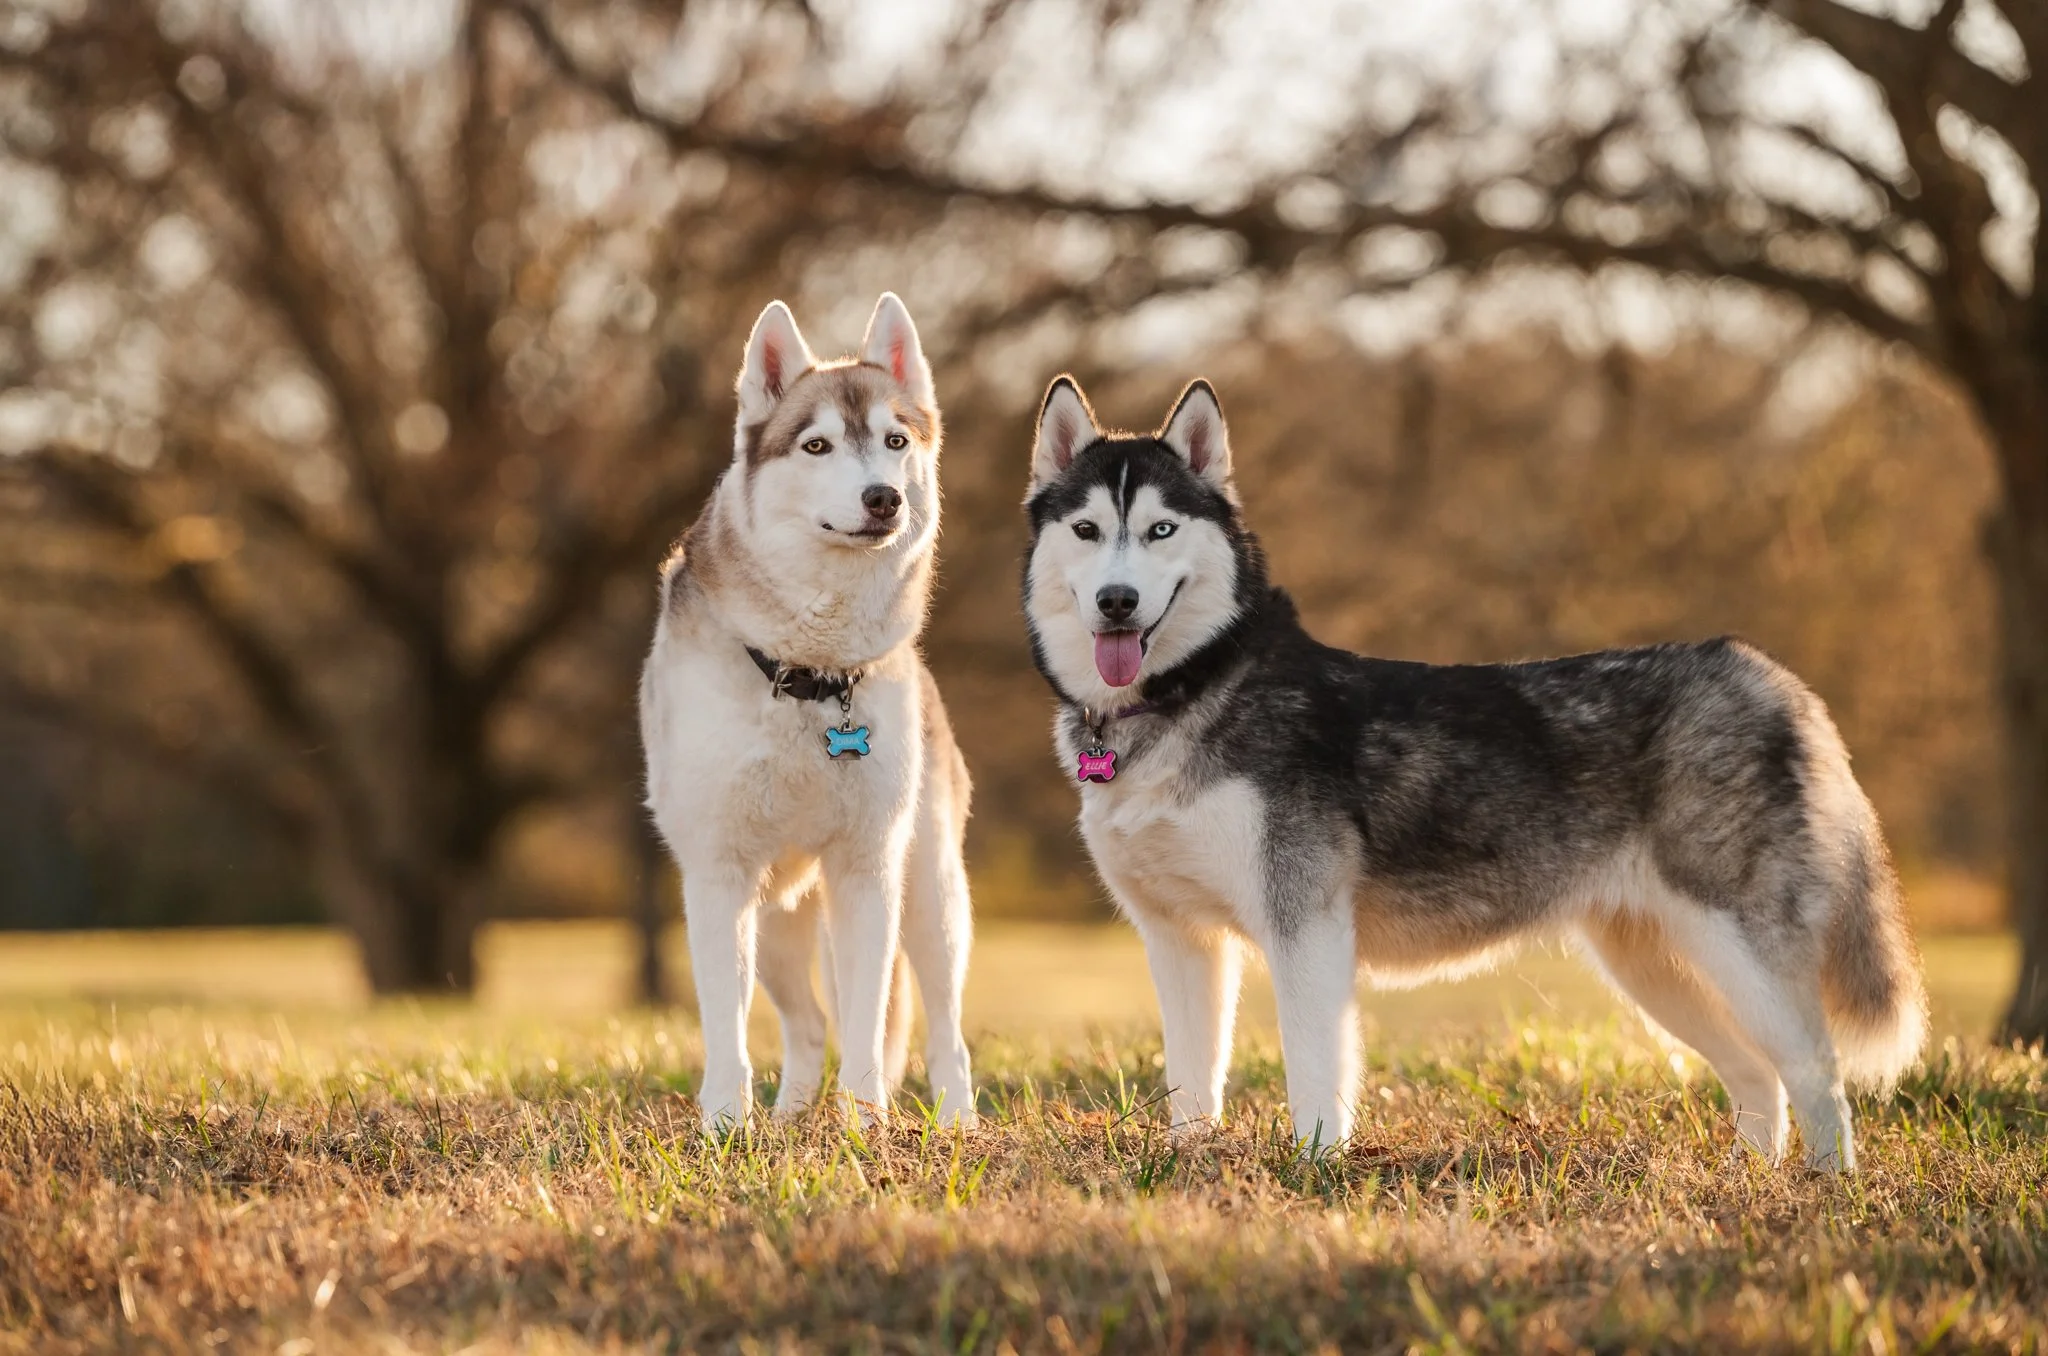
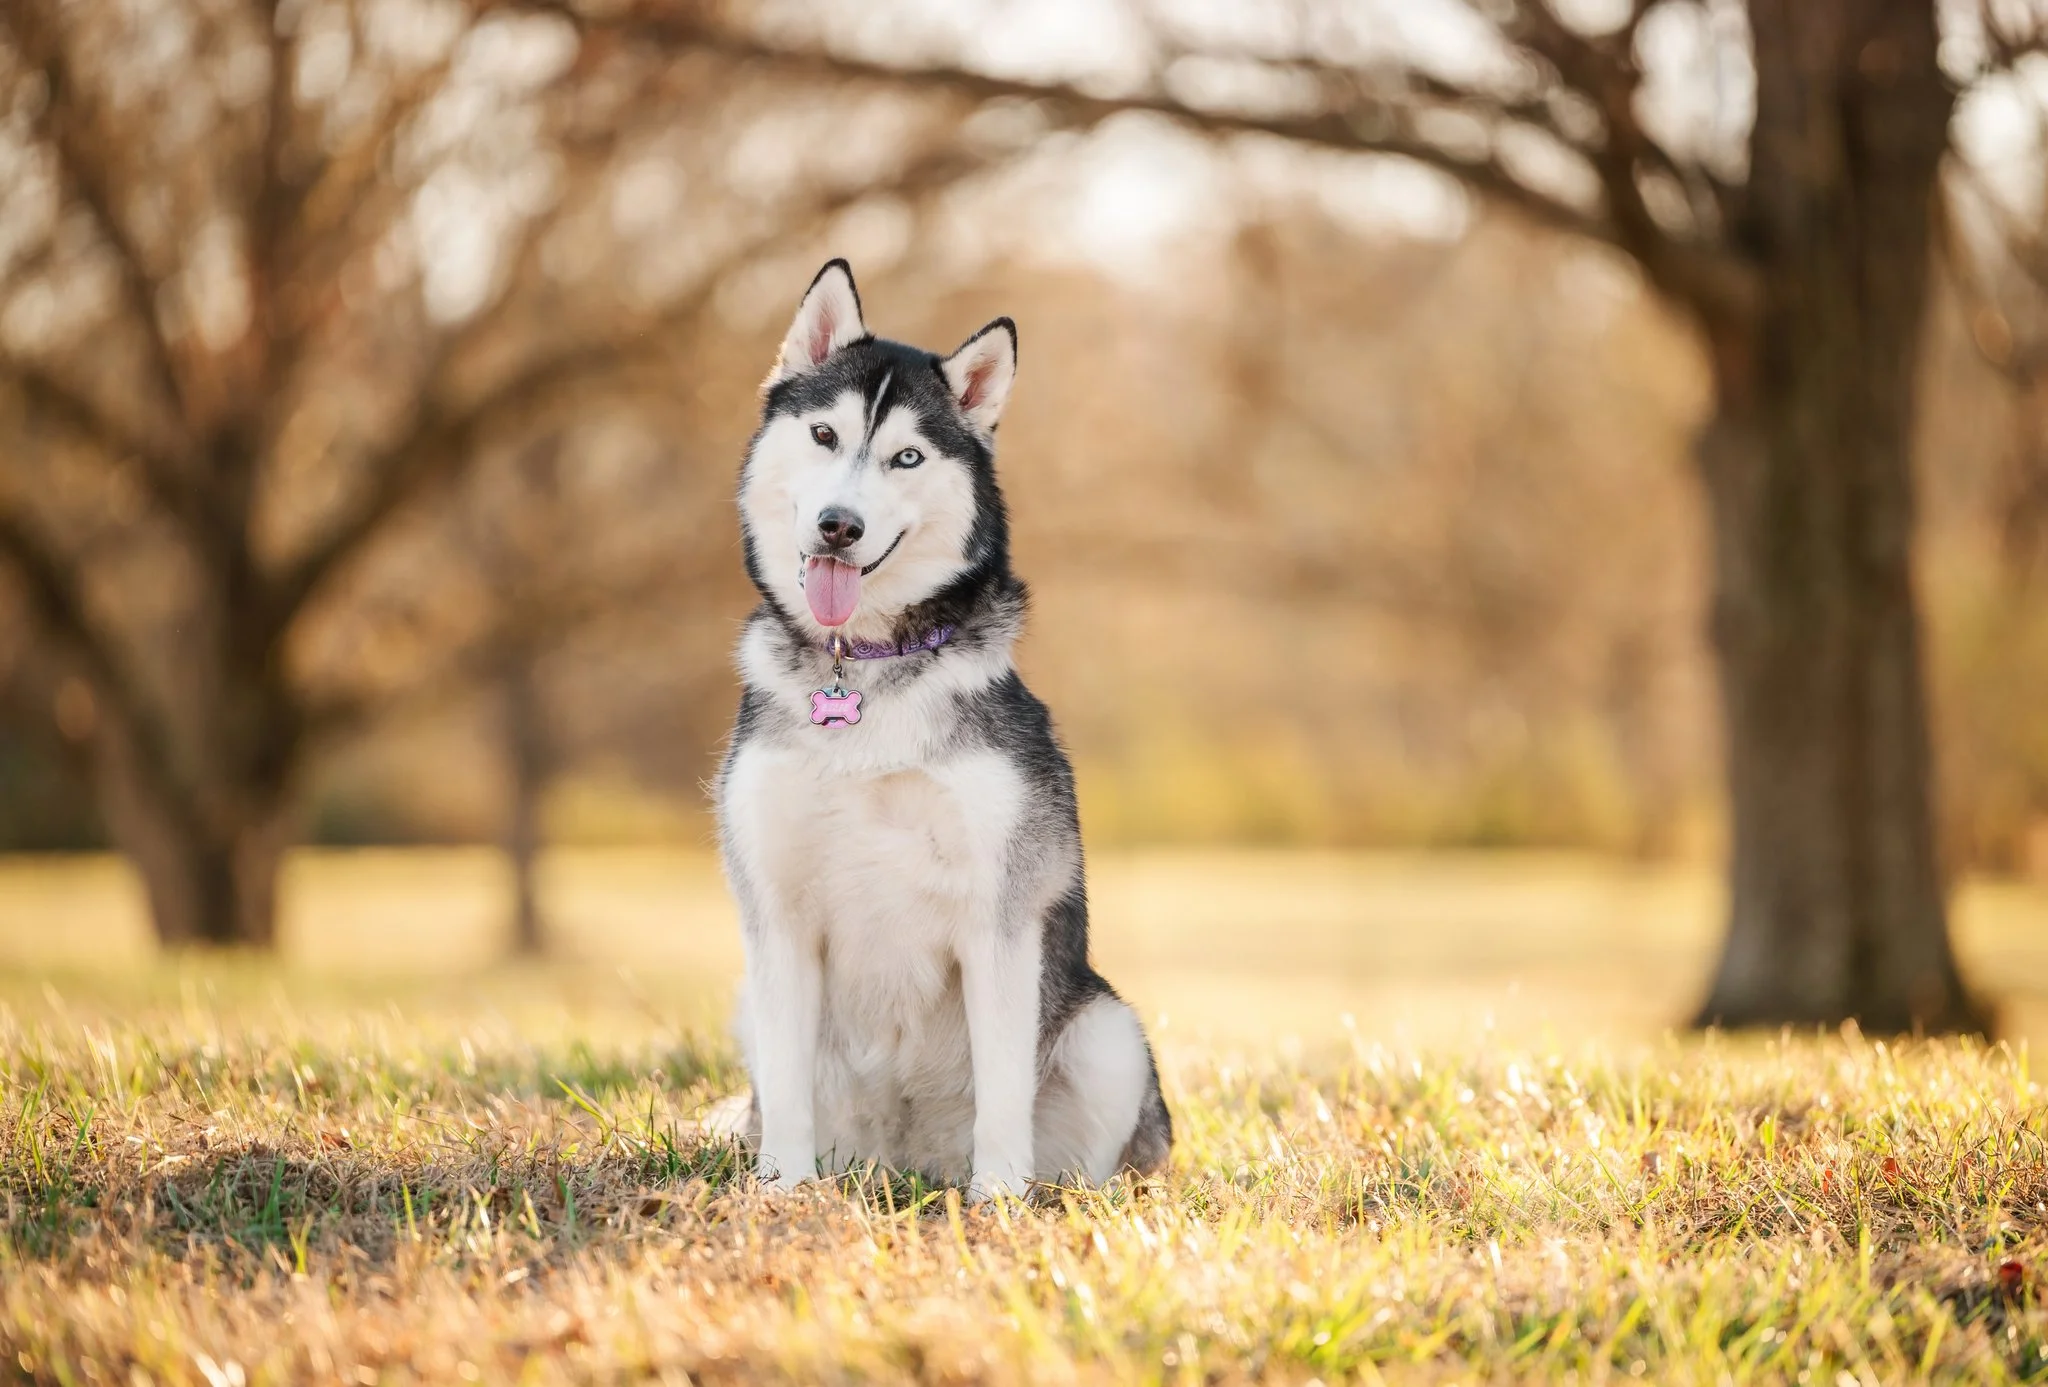
Soft, indirect light is the most forgiving and the most consistent. I look for open shade where light bounces off a neutral-colored surface — light concrete, pale buildings, open sky. In studio I look for gentle window light. Soft light gives you even fur detail, clean catchlights, less squinting, and none of the harsh shadows under the chin and eyes that make outdoor portraits look amateurish.
Backlight is my personal preference — if I could work in backlight 90% of the time I would. I look for the sun positioned behind the dog, light filtering softly through trees, and the particular glow that forms around highlighted fur edges. For fluffy dogs especially, backlight creates a rim of light around every strand of fur that makes portraits look like they were lit in a studio. It also separates your dog from the background in a way that creates the "wow" feeling where the whole world looks golden and almost too good to be real.
Step 2: Background
My #1 goal: a background that goes soft.
Background — What Goes Soft Behind the Dog
Once I've found the light, I look behind the dog.
My primary goal is a background that goes soft and doesn't pull the eye away from the subject. Most of my favorite dog portraits have clean, minimalist backgrounds — not because I want images to look sterile, but because I’m photographing a dog, and the background is a supporting character, not the main attraction.
In practice this means: the background is far enough behind the dog to blur at my aperture, it's a neutral or complementary tone to the dog's coloring, and it contains no bright patches of light, strong geometric shapes poking out from the dog, or high-contrast elements that would catch the eye first.
I also think about where the portrait is eventually going to live in your home. A background that feels at home in your actual room — that echoes the tones on your walls and in your furniture — is a background that helps the finished artwork belong rather than feel dropped in.
Then—if the background is clean—I’ll look to add interest on purpose.
Two “bonus” background elements I love
1) Leading lines
Paths, fences, shoreline edges, rows of trees—anything that naturally pulls your eye toward the dog.
2) Natural framing
Doorways, branches, tall grass, arches, columns—anything that subtly “frames” your dog.

Step 3: Foreground
Once I’m happy with light and background, I check what’s between me and the dog.
Placement — The Ideal Plan, With Real Dog Flexibility
Once I have light, background, and foreground sorted, I think about where to put the dog within the frame.
I default to off-center placement — the classic rule of thirds — because it gives the image visual breathing room and feels more natural than a dog centered in the middle of every frame. I also think about what the dog is looking at and where their body is oriented, because the eye follows the dog's gaze and a dog looking toward empty space creates more tension and interest than one looking at the edge of the frame.
And then the dog does what the dog does.
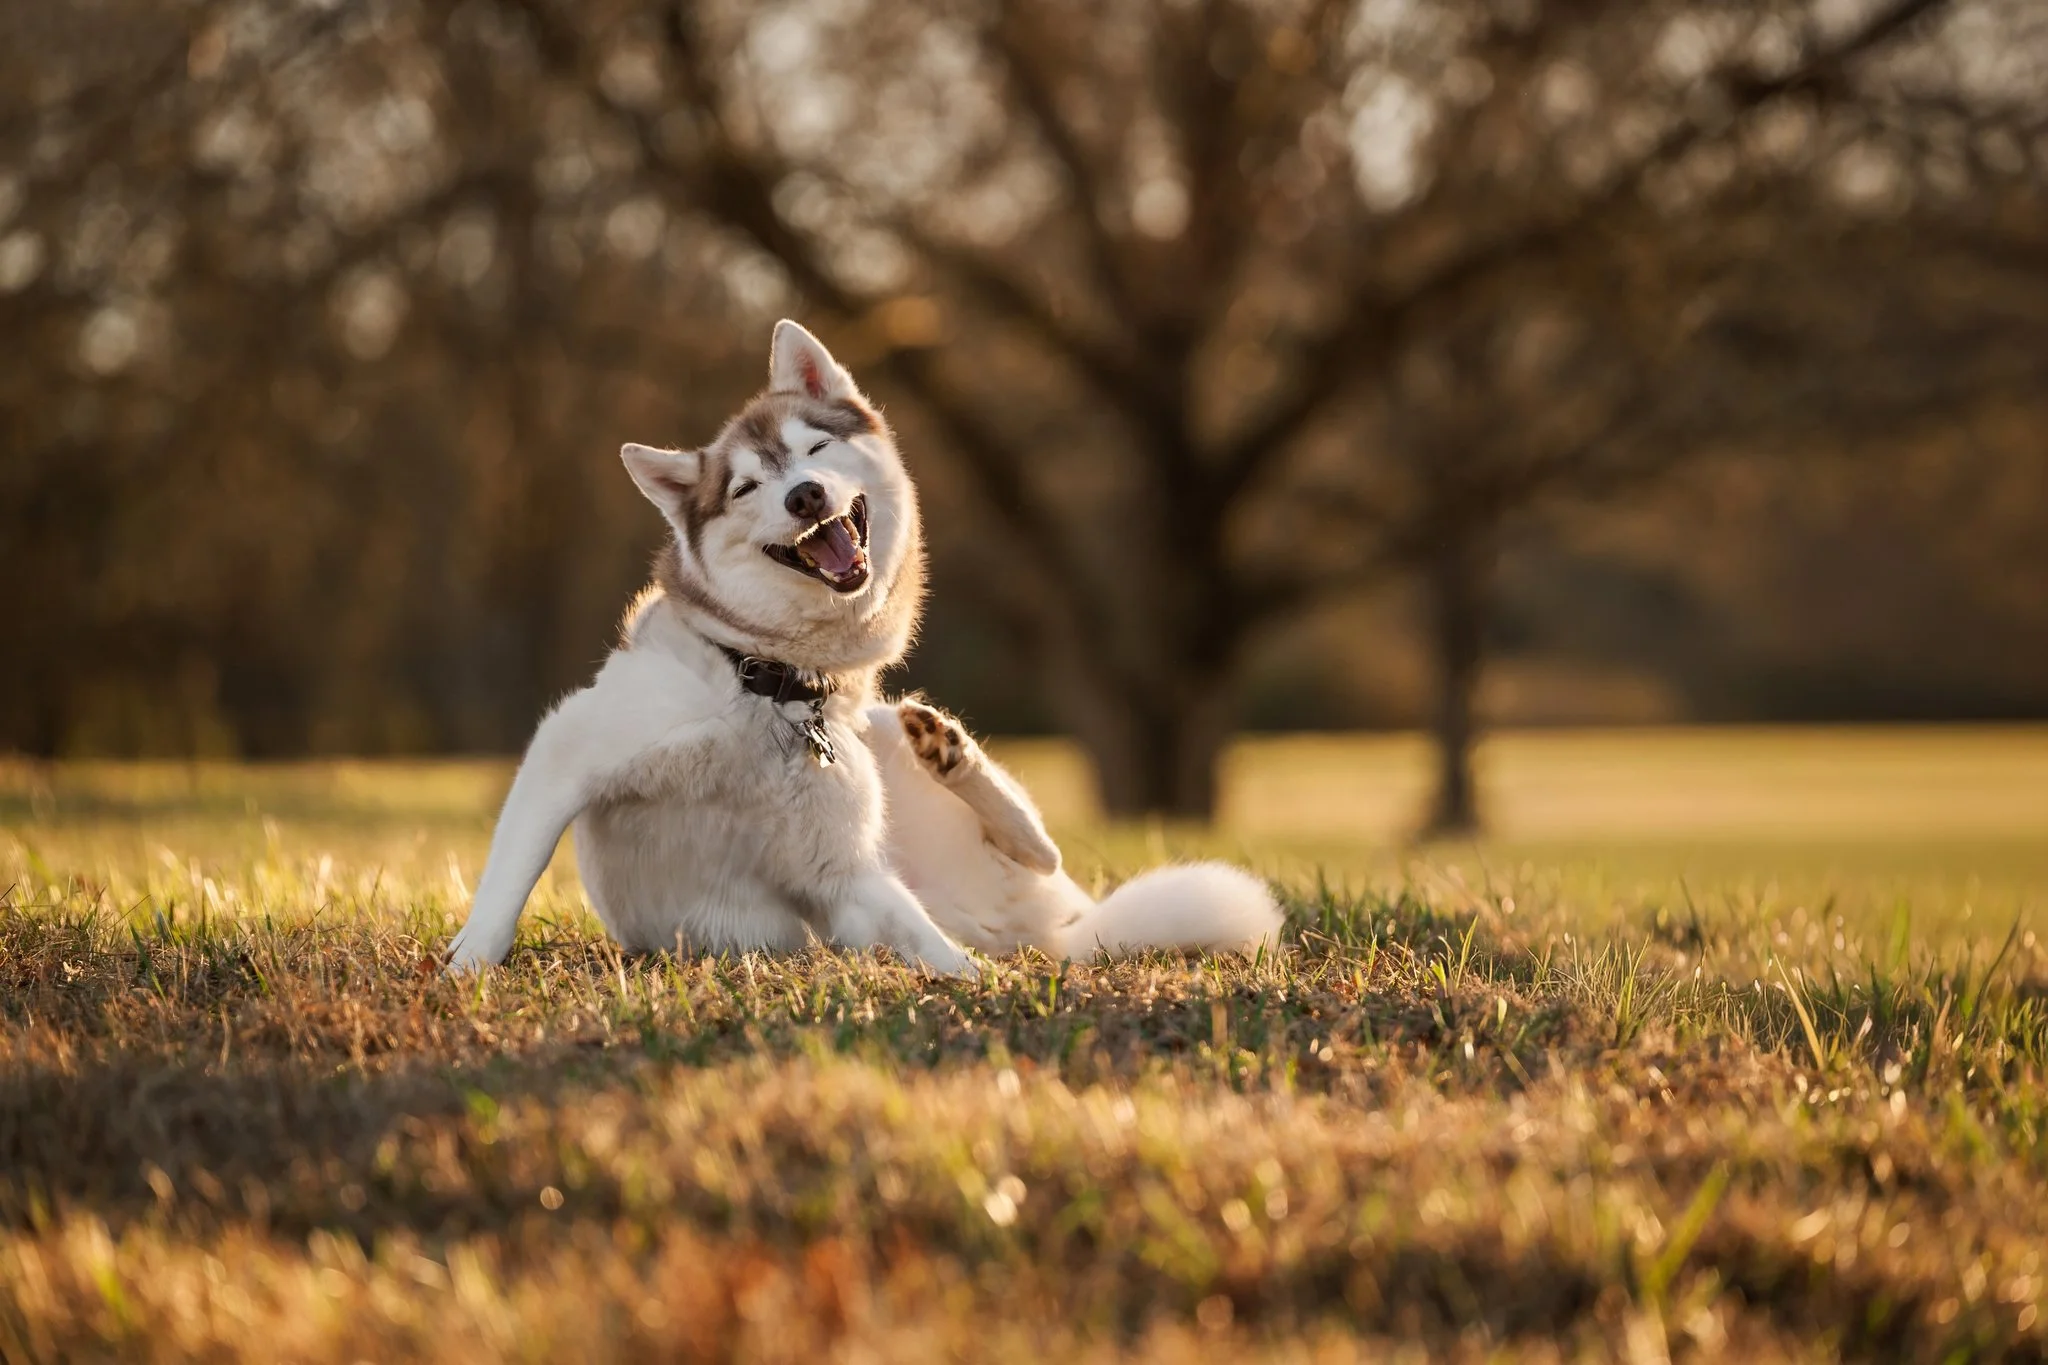
The plan is always subject to the reality of working with an animal who has their own ideas about where to stand and what's interesting. My job is to have the framework ready so that when the dog offers me a real moment — a genuine expression, an unguarded look — everything else is already set up to receive it.
Step 4: Posing
I always have an ideal version in my head… and I’m never attached to it.
Once I’ve chosen the light, cleaned up the background, and checked the foreground, then I think about posing.
And here’s the thing I tell every client:
I always have an ideal version in my head… and I’m never attached to it. Because dogs are not props. Your session is always dog-first, meaning I am constantly reading their body language and taking cues from your dog to make sure they are comfortable.
What “ideal” looks like (in my brain)
It might be:
front paws up on a rock, back paws down
standing with weight evenly balanced
head slightly tilted toward camera
ears up, expression alert but relaxed
I’ll explain what I’m aiming for so you know the plan.
What happens in real life (with real dogs)
Your dog might:
sit instead
lie down
look away
decide that today is not a “standing on a rock” kind of day
And that’s okay.
Because this is where composition matters more than control.
If the dog sits instead of stands? I might switch to a vertical frame.
If the dog lies down? I lower myself and change the frame.
If the dog looks away? I adjust the crop and angle.
A perfect photo doesn’t require a perfect dog.
It requires a photographer who can work with what the dog offers. I always try to see the dogs I am working with as co-creators in our image. We’re working together, and sometimes their idea of a pose is better than anything I could ask them to do, like Dima’s pose above!
The “placement formula” I use every session
If you want the simple version:
Light → Background → Foreground → Position
Where would we photograph your dog? Looking for inspiration - check out my FREE Location Guide for my favorite locations around Atlanta to photograph dogs.
→ Read next: